FireEye Endpoint Security (HX Series) On-Premises Device
Configure a FireEye Security Endpoint (HX Series) on-premises device.
The following table shows device-specific integration characteristics:
| Characteristic | Description |
|---|---|
| Method of push | All new IOCs that were discovered since the previous update are pushed to the device. |
| IOC types supported | Domains, file hashes (MD5, SHA-1, and SHA-256), IP addresses, and URLs. |
| IOC group limitation | All IOC types can be pulled in the same group. |
Device-specific integration characteristics table
IOCs are pushed from Digital Risk Protection (Threat Command) to the device.
To integrate the device, perform these steps (described in the following sections):
- Add the device to the Digital Risk Protection (Threat Command) with the virtual appliance web interface.
- Configure an IOC group whose IOCs will be pushed to the device.
FireEye Security Endpoint devices are supported with the Digital Risk Protection (Threat Command) OVA v5.2.0 or later.
Add a FireEye Endpoint Security on-premises device
Use the Digital Risk Protection (Threat Command) virtual appliance web interface to integrate the device with Digital Risk Protection (Threat Command).
Prerequisites
- You have administrative credentials to access Digital Risk Protection (Threat Command) with a subscription to the Automation and TIP modules.
- You have the credentials to access the Digital Risk Protection (Threat Command) virtual appliance web interface.
- You have the administrative credentials to access the device management console.
- You have the credentials of a user with API permissions (either the role of API Analyst or API Admin).
To add a FireEye Endpoint Security device:
- From an internet browser, navigate to https://<virtual appliance IP address>
- Log in to the Digital Risk Protection (Threat Command) virtual appliance using the web access username and password.
- From the Devices page, click Devices.
- Click Add new device.
- In the Devices screen, set up the new device:
- Type a user-defined, unique device name (for example, FE_HX).
- Select the FireEye Endpoint Security device type.
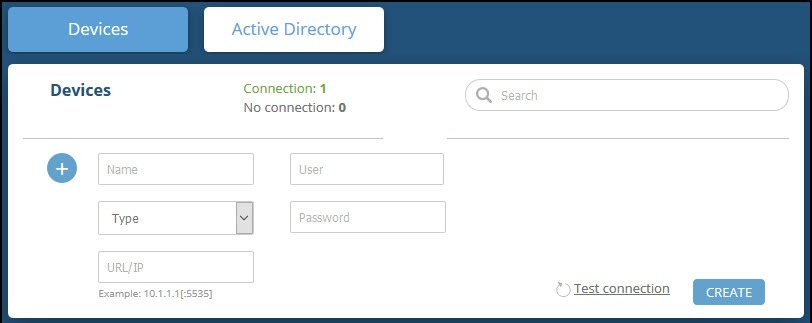
- Type values for User and Password. These are the credentials of a user with API permissions.
- Type the URL or IP address of the FireEye Security Endpoint machine.
- (Optional) You can test the connection by clicking Test connection.
- Click Create.
- Review and approve messages.
- Verify that the new device is displayed in the Digital Risk Protection (Threat Command) platform:
- Log in to Digital Risk Protection (Threat Command) at https://dashboard.ti.insight.rapid7.com
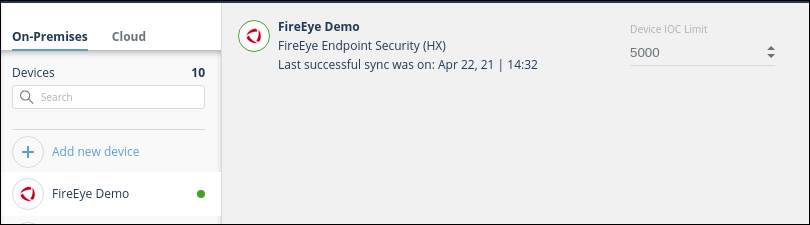
- From the main menu, selectAutomation > Integrations. If this window is already open, refresh it by selecting Automation > Integrations from the menu. The new device is displayed in the On-Premises tab.
The following figure shows a newly added device in the Digital Risk Protection (Threat Command) Automation > Integrations window:
Configure an IOC group to push IOCs to the device
Once the FireEye Security Endpoint device has been added and is synching with the Digital Risk Protection (Threat Command) virtual appliance, it is ready to receive IOCs that are pushed from Digital Risk Protection (Threat Command). IOCs are pushed by creating an IOC group for this device in Digital Risk Protection (Threat Command).
Create the IOC group, as described in Create an IOC group..
Verify that IOCs are being pushed to the device
You can verify that IOCs are being pushed to the FireEye Security Endpoint device.
To verify IOCs:
- From the Digital Risk Protection (Threat Command) main menu, select Automation > Integrations.
- Select the device.
- On an IOC group of the device, click the Information icon:
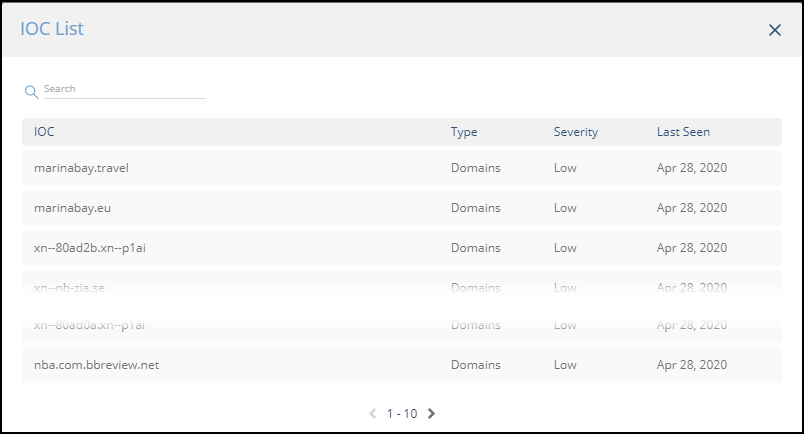
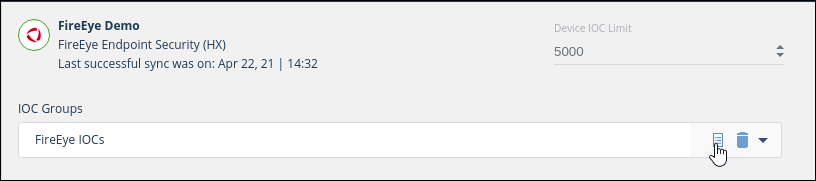 The IOCs in the group are displayed:
- From the FireEye Endpoint Security management console, navigate to Rules > Indicators.
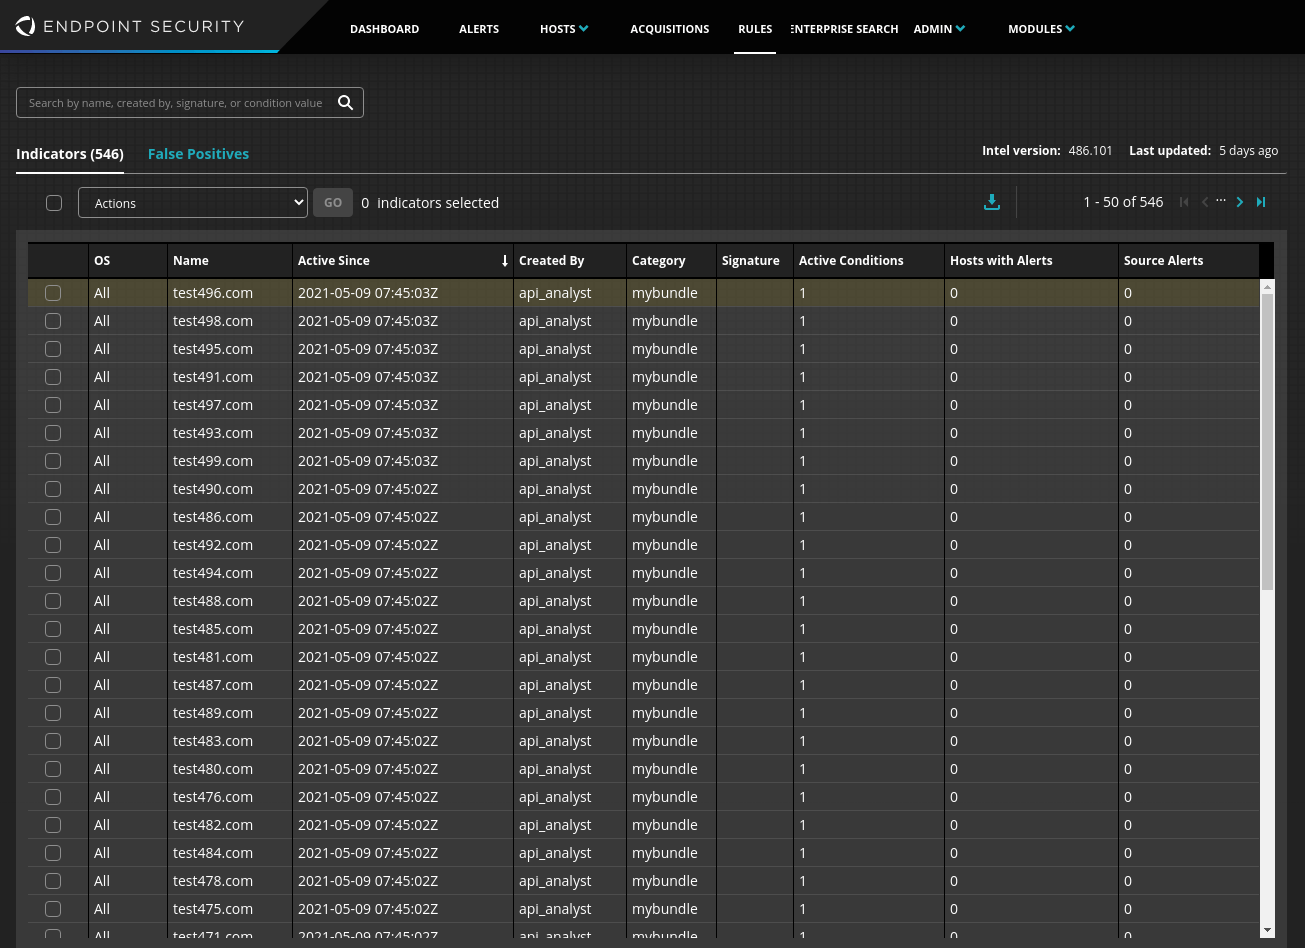 The Category name is the name of the Digital Risk Protection (Threat Command) IOC group.
The integration automatically assigns an Active Condition to each IOC.