Configure Okta SSO
You can enable users to access Digital Risk Protection (Threat Command) with Okta SSO. In addition, you can enable SP-initiated SSO and user provisioning with the SAML Just In Time (JIT) method.
User provisioning with JIT enables users to register new users to Digital Risk Protection (Threat Command) directly from Okta, thus bypassing the need to set up each user in Digital Risk Protection (Threat Command). For more information, see Provisioning Users with JIT.
Enable access to Digital Risk Protection (Threat Command) with Okta SSO
Add the Digital Risk Protection (Threat Command) application to the customer Okta account.
This section describes the basic Okta configuration process. The process is described fully at https://saml-doc.okta.com/SAML_Docs/How-to-Configure-SAML-2.0-for-IntSights.html .
Before you begin, ensure that:
- You can access the Okta account as an administrator.
- You can access the Digital Risk Protection (Threat Command) as an administrator.
- (Optional) To enable SP-initiatedlogin, you can provide the IDP URL and Issuer ID for the SSO provider. You can get these values from the Okta Admin Dashboard .
To enable Okta access to the Digital Risk Protection (Threat Command):
- Log in to Okta as an administrator.
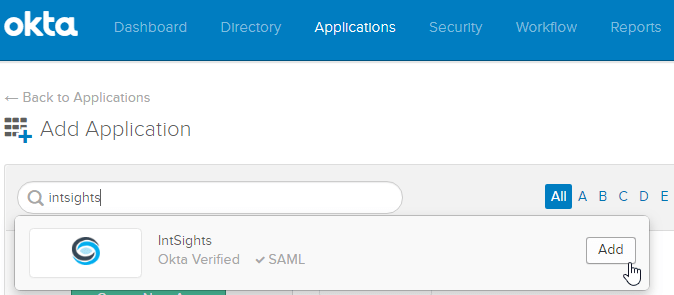
- Add the Digital Risk Protection (Threat Command) application to Okta:
- From the Okta Applications menu, search for the Rapid7 application.
- On the Rapid7 application line, click Add.
- In the Base URl**** field of the General Settingsdialog, type the Digital Risk Protection (Threat Command) URL:
https://dashboard.ti.insight.rapid7.com -

- Click Done.
- Download the Rapid7 certificate:
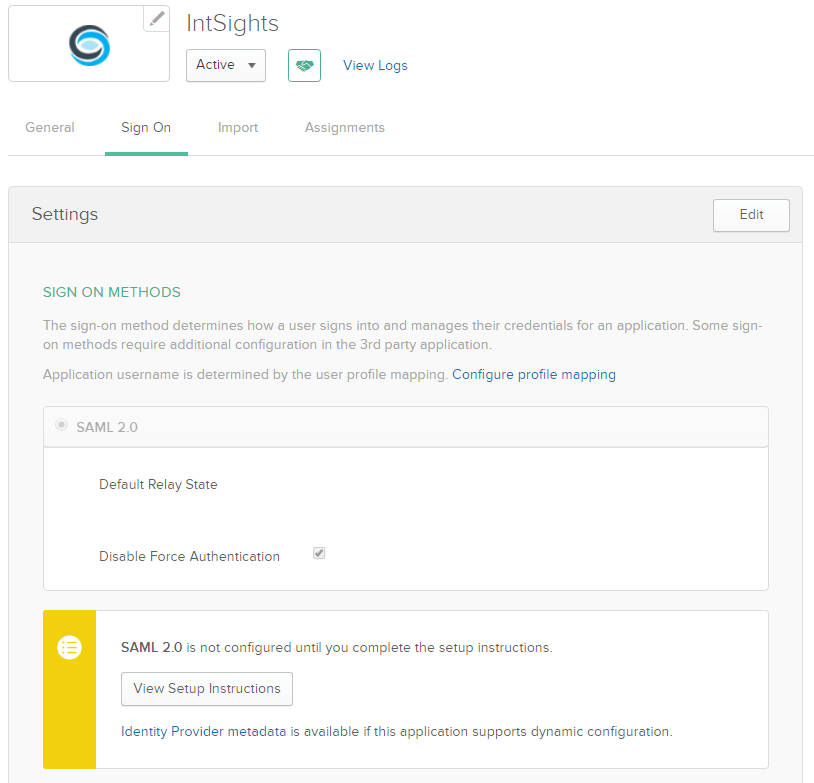
- From the Okta Rapid7 application page, select the Sign On tab.
- In the Settings**** section, click View Setup Instructions:
- From the Configuration Steps dialog, download the certificate, and name it okta.cert: (You can ignore the other instructions in this dialog.)

- Log in to Digital Risk Protection (Threat Command) as an administrator.
- From the Digital Risk Protection (Threat Command) main menu, select Settings > Authentication.
- Enable SAML single sign-on :
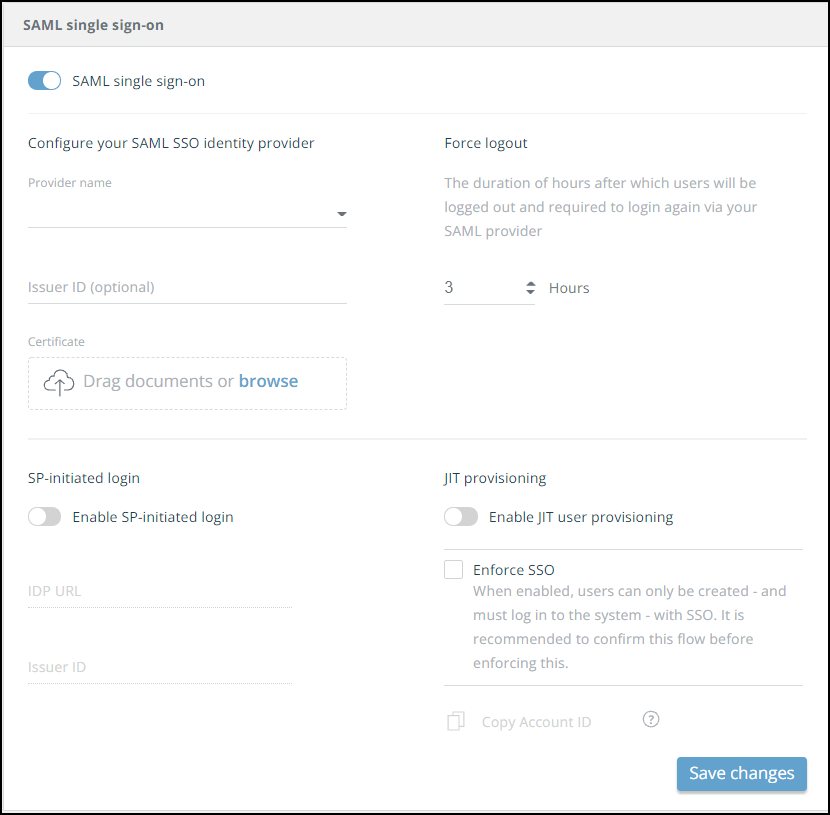
- For Provider name, select okta.
- Upload the okta.cert certificate.
- (Optional) To enable SP-initiated login to the Digital Risk Protection (Threat Command), perform the following:
- Select Enable SP-initiated login.
- Enter the IDP URL and Issuer ID. You can get this information from the SSO provider. For more information, see Enable SP-Initiated User Login.
- (Optional) In the Force logout section, set the maximum hours for a user session to remain valid. After this time period, the user must sign in through their SSO to regain access to the Digital Risk Protection (Threat Command).
- (Optional) To enable JIT user provisioning, perform the following:
- Select Enable JIT user provisioning.
- (Optional) When JIT provisioning is enabled, you can force users to log in with SSO.
To enforce this, click Enforce SSO.
Users will not be able to use the Digital Risk Protection (Threat Command) username and password, only SSO. Ensure that your setup supports this before enabling this option. - To get the account ID needed to configure JIT in Okta, click Copy account ID. For more information about provisioning users, see Provisioning Users with JIT.
- Click Save Changes.
Enable JIT use provisioning in Okta SSO
To complete the JIT provisioning setup, you need to perform additional steps in the Okta application.
In the Okta SAML Attributes (Optional) section, the following additional attributes must be set:
| Required claim | Value |
|---|---|
| intsightsAccountId | Paste the account ID from the Digital Risk Protection (Threat Command) SAML single sign-on dialog. |
| intsightsRole | Select Adminor Analyst |
For complete instructions, see Rapid7.html”>https://saml-doc.okta.com/SAML_Docs/How-to-Configure-SAML-2.0-for-Rapid7.html .