Integrate an ArcSight REST On-Premises Device
Configure an ArcSight REST FlexConnector on-premises device to pull IOCs from Digital Risk Protection (Threat Command).
The following table shows device-specific integration characteristics:
| Characteristic | Description |
|---|---|
| Method of pull | All new IOCs that were discovered since the previous update are pulled. |
| IOC types supported | Domains, MD5 file hashes, IP addresses, and URLs. In addition, you can choose to pull the IOC event stream, including events such as add or delete. |
| IOC group limitation | All IOC types can be pulled in the same group. |
| Device IOC limit | The device is limited to 300,000 IOCs. |
Pulled IOCs are accompanied by the following Rapid7 enrichment data:
- Alert ID
- Severity
- Last seen
- First seen
- Source name
(Enrichment data is sent when using the Digital Risk Protection (Threat Command) virtual appliance, from v 3.8 and later. In earlier versions, only the IOC is sent.)
To integrate the device, perform these steps (described in the following sections):
- Add an ArcSight FlexConnector REST on-premises device.
Note: Only v7.10 is supported. - Configure an ArcSight FlexConnector REST device to pull IOCs.
At this point, you will need to choose whether to pull only enriched IOCs or to pull the event stream also. - Add a connector configuration file.
Add an ArcSight REST on-premises device
The procedure to add the device to Digital Risk Protection (Threat Command) is different depending on the version of the Digital Risk Protection (Threat Command) virtual appliance in your environment. To determine which version is running, see Determine the Version of Virtual Appliance.
Add the on-premises device
Add the device in virtual appliance v3.9
Prerequisites:
- The Digital Risk Protection (Threat Command) virtual appliance web interface is configured and you can access it.
- You have the credentials to access the device.
- You have administrative credentials to access Digital Risk Protection (Threat Command) with a subscription to the Automation and TIP modules.
To add the device to Digital Risk Protection (Threat Command):
- From an internet browser, navigate to https://<virtual appliance IP address>
- Log in to the virtual appliance using the web access username and password.
- From the Devices page, click Devices (Pull).
- Click Add new device.
- In the Devices (Pull) screen, set up the new device:
- Type a user-defined, unique device name.
- Select the device type.
- Click Create.
- Verify that the new device was added:
- Log in to Digital Risk Protection (Threat Command) at https://dashboard.ti.insight.rapid7.com
- From the main menu, select Automation > Integrations.
If this window is already open, refresh it by selecting Automation > Integrations from the menu.
The new device is displayed in the On-Premises tab.
Add the device in virtual appliance v4.0
Prerequisites:
- You have the credentials to access the Digital Risk Protection (Threat Command) virtual appliance web interface.
- You have the credentials to access the device.
- You have administrative credentials to access Digital Risk Protection (Threat Command) with a subscription to the Automation and TIP modules.
To add the device to Digital Risk Protection (Threat Command):
- Log in to Digital Risk Protection (Threat Command) at https://dashboard.ti.insight.rapid7.com
- From the main menu, select Automation > Integrations.
- From the Integrations page, click On-Premises.
- Click Add new device.
- In the Add New On-Premises Device dialog, type a user-defined name for the device.
The name can contain a maximum of 50 letters, spaces, numbers, and underscores. - Select the Device type.
The default device IOCs limit is displayed. - (Optional) You can change the IOCs limit.
- Click Add.
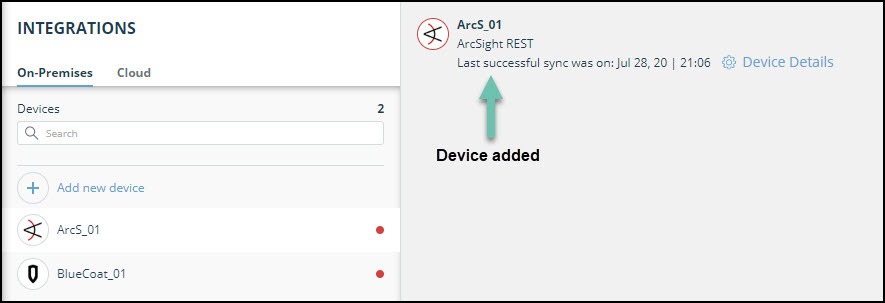
- To verify that the new device is added, refresh the Automation > Integrations page.
Next to the device name, there is a red dot, indicating that communication has not yet been established. The dot will change to green when the device is synchronized. If the device cannot synchronize for more than 48 hours, an email warning is sent to the account administrator.
Configure an ArcSight REST device to pull IOCs
After a device has been added to the Digital Risk Protection (Threat Command) virtual appliance, you must enable it to pull IOCs from Digital Risk Protection (Threat Command).
Configuration for on-premises devices
When configuring an on-premises device, it is important to know which version of the Digital Risk Protection (Threat Command) virtual appliance is running in your environment. This will affect which Rapid7 URL is displayed in the Device Details screen and also which URL to copy into the device management console.
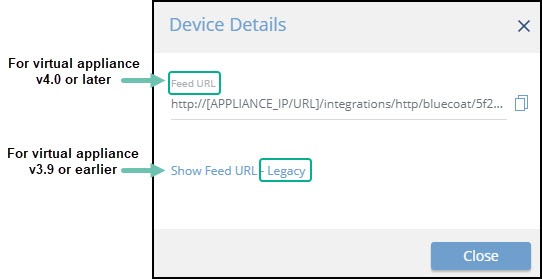
When running version 4.0 or later, the Legacy URL should be used only with Rapid7 support.
To determine which version of the virtual appliance is running, see Determine the version of virtual appliance.
Prerequisites
-
You have the device login credentials.
-
The device has been added.
-
You have administrative credentials to access Digital Risk Protection (Threat Command) with a subscription to the Automation and TIP modules.
-
An IOC group for this device exists in Digital Risk Protection (Threat Command).
Creating IOC groups is described in Create an IOC group -
You can download and execute the ArcSight Connector file (v7.10 only).
-
You have the device hostname, username, and password.
-
You know whether you want to pull only IOCs or IOCs and the event stream.
-
For on-premises devices, you know which version of the virtual appliance is running in your environment.
-
You have the certificate information (optional).
To edit an existing connector configuration, see Change Existing ArcSight Configuration.
First, set up a connector, then add a connector configuration file. Some of the steps will differ depending on whether you are pulling only IOCs or IOCs and the event stream.
To set up a connector:
-
Download and run the ArcSight Connector executable file, which should resemble the following:
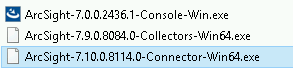
-
In the installation wizard Introduction screen, click Next.
-
In the Choose Install Folder screen, select a free folder for the ArcSight. Remember the directory you use. For this example, C:\program files\IntsightsRestArcSightSmartConnectors is used.
-
Click Next.
-
In the Pick Shortcut Folder screen, select where to create a program icon, then click Next.
-
In the Pre-Install Summary screen, review the details, then click Install. The ArcSight Connector setup begins. This process can take some time.
-
In the Connector Setup screen, select Add a Connector, and then click Next.
-
In the Connector to configure screen, select ArcSight FlexConnector REST, then click Next. In the Parameter details screen, enter the relevant details from the Digital Risk Protection (Threat Command) Device Details screen for the defined ArcSights device, described in the next step.
-
Display the Digital Risk Protection (Threat Command) device details:
- From Digital Risk Protection (Threat Command), select Automation > Integrations.
- From the On-Premises device list, select the ArcSight REST device that was added.
- Click the Device Details link at the top of the screen.
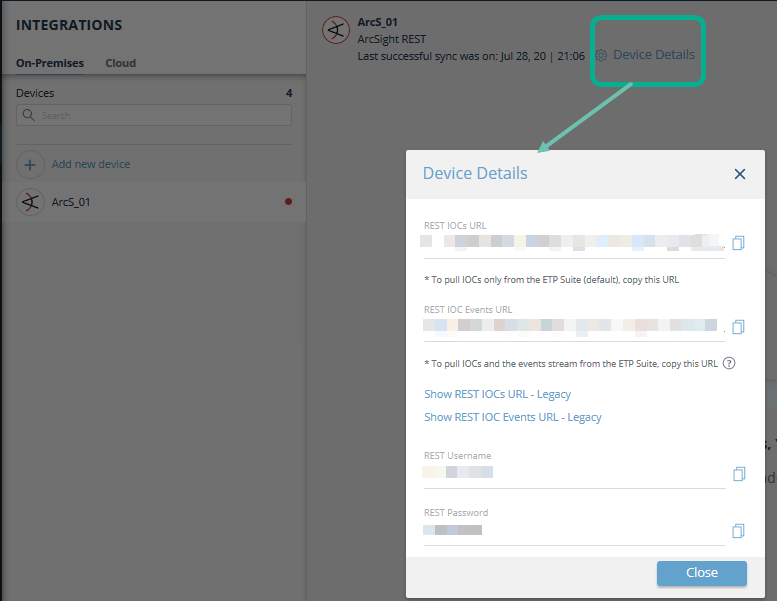
Use the device details in the next step.
-
In the ArcSight parameter details screen, type the information for your device, including relevant information from the Digital Risk Protection (Threat Command) Device Details dialog:
Field Value Description Port, User Name, and Password As needed, per client Optional Configuration File intsights Required. - Type “intsights” in lowercase. - This configuration file will be created after the connector is installed. Events URL
(For virtual appliance v3.9 or earlier, click the link and copy the relevant LegacyURL.)To pull IOCs only, use the REST IOCs URL from the Digital Risk Protection (Threat Command) Device Details screen.
To pull the IOCs and the event stream, use theREST IOC Events URLfrom the Digital Risk Protection (Threat Command)Device Detailsscreen.Example
https://rest.intsights.com/arcsight/events/5abcef01234567890abcdef0?start\_date=$START\_AT\_TIME&limit=5000
Do not change $START_AT_TIME
You must replace [APPLIANCE IP/URL] with the actual Digital Risk Protection (Threat Command) virtual appliance IP address.
You can control the rate of events by specifying a different limit. For example, use limit=1000 to receive 1000 events at a time.
Example: https://rest.intsights.com/arcsight/events/5bfe93cbf5ea810645c33a?start\_date=$START\_AT\_TIME&limit=1000
Example
https://rest.intsights.com/arcsight/eventstreams/5abcef01234567890abcdef0?start\_date=$START\_AT\_TIME&limit=5000
Do not change $START_AT_TIME
You must replace [APPLIANCE IP/URL] with the actual Digital Risk Protection (Threat Command) virtual appliance IP address or URL (in this case https://rest.intsights.com ).
You can control the rate of events by specifying a different limit. For example, use limit=1000 to receive 1000 events at a time.
Example: https://rest.intsights.com/arcsight/eventstreams/5bfe93cbf5ea810645c33a?start\_date=$START\_AT\_TIME&limit=1000Authentication Type Basic Required User Name From the Digital Risk Protection (Threat Command) Device Details Required Password From the Digital Risk Protection (Threat Command) Device Details Required OAuth2 Client Properties File Optional Refresh Token Optional -
After typing the parameters, click Next.
-
In the destination type screen, select ArcSight Manager (encrypted), then click>Next.
The Connector Setup wizard begins.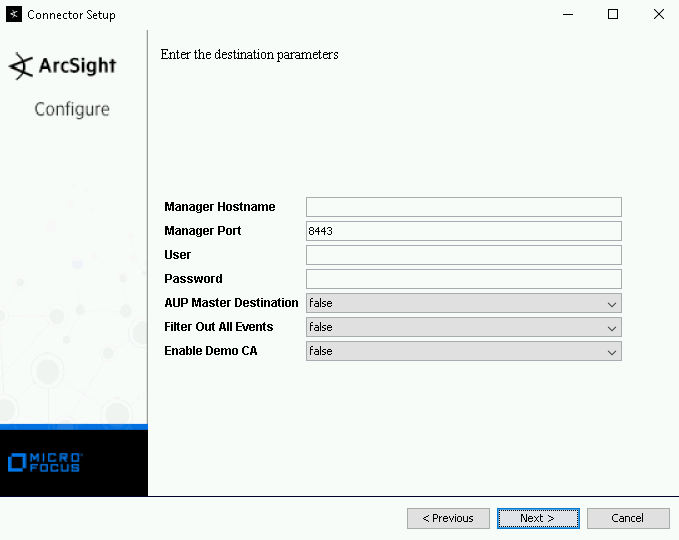
-
In the destination parameters screen, type the ArcSight Manager hostname, username, and password, and then click Next.

-
In the connector details screen, type values for the Name, Location, Device Location, and a comment (optional).
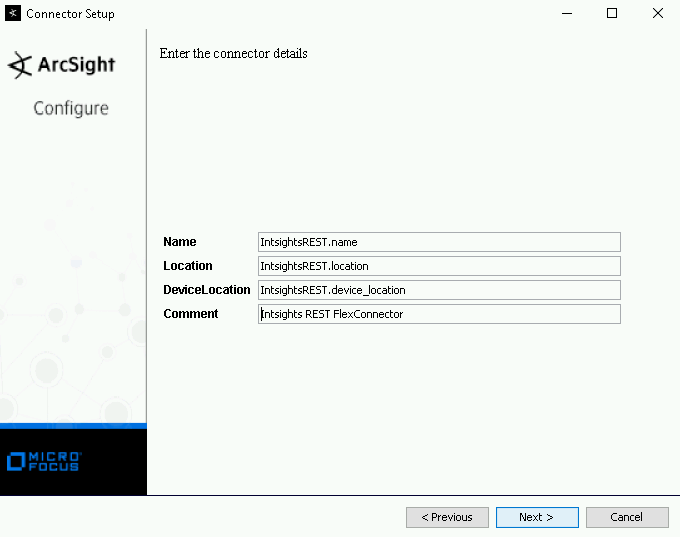
These user-defined details are used later to identify events emerging from this connector.
-
Click Next.
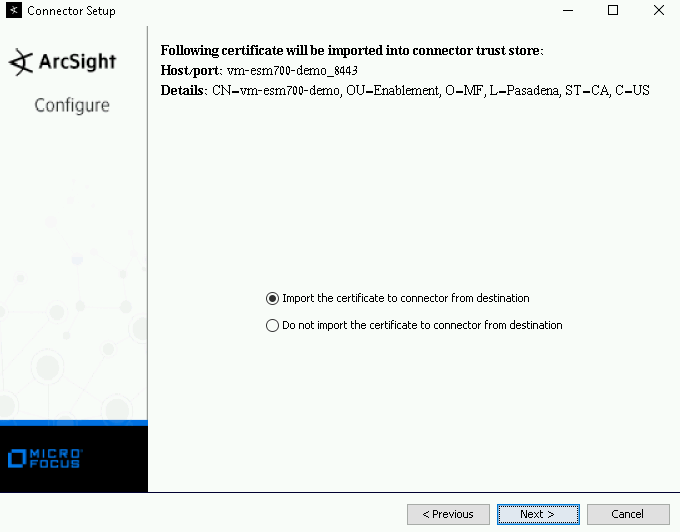
-
In the certificate screen, select whether to import a certificate, then click Next.
The import process can take a while. When it is complete, the summary screen appears.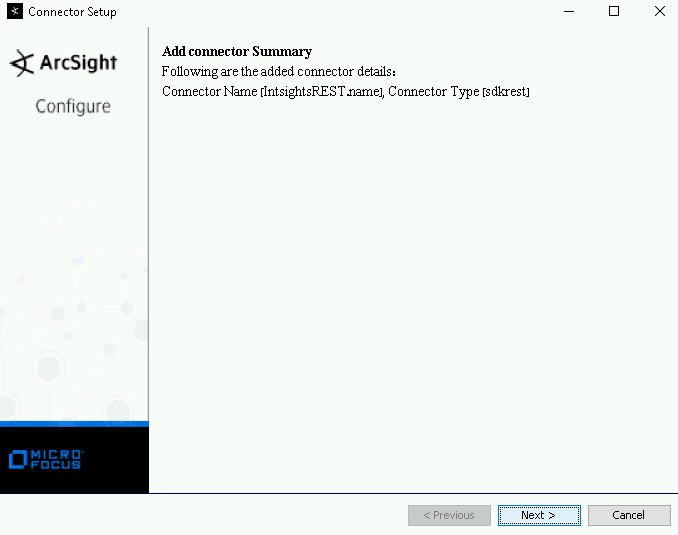
-
Click Next.
-
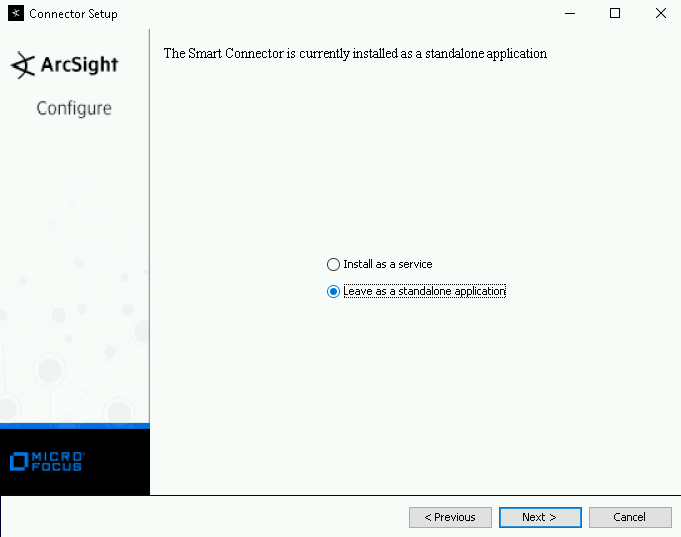
In the service or standalone screen, select an option, then click Next.
-
At the Continue or Exit screen, select Exit, then click Next.
-
Click Done. The integration is complete.
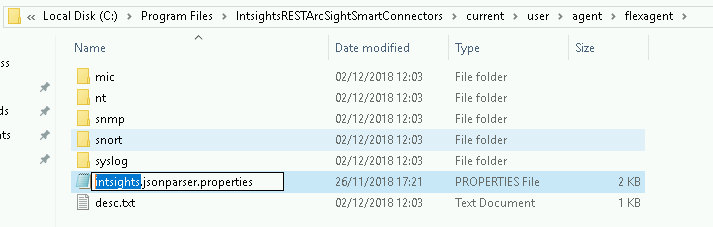
To add a connector configuration file
- Use a text editor to create intsights.jsonparser.properties in the [INSTALL_FOLDER]\current\user\agent\flexagent\ folder.
The filename must begin with the value that was entered in the Configuration file field in the ArcSight Parameter details screen.
- Use one of the following for the file contents:
Pull IOCs only
trigger.node.location=/iocs
token.count=9
token[0].name=kind
token[0].type=String
token[0].location=/kind
token[1].name=requestDate
token[1].type=String
token[1].location=/request_date
token[2].name=iocType
token[2].type=String
token[2].location=type
token[3].name=iocValue
token[3].type=String
token[3].location=value
token[4].name=bundle
token[4].type=String
token[4].location=bundle
token[5].name=updateTime
token[5].type=String
token[5].location=update_time
token[6].name=enrichment
token[6].type=String
token[6].location=enrichment
token[7].name=nextStartDate
token[7].type=String
token[7].location=/next_start_date
token[8].name=nextUrl
token[8].type=String
token[8].location=/next
event.deviceReceiptTime=__createOptionalTimeStampFromString(nextStartDate,"YYYY-MM-DDThh:mm:ss.SSSX")
event.deviceCustomString6=nextUrl
event.deviceVendor=__stringConstant("Intsights")
event.deviceProduct=__stringConstant("Intsights Virtual Appliance")
event.deviceCustomString1=iocType
event.deviceCustomString1Label=__stringConstant("IOC type")
event.deviceCustomString2=iocValue
event.deviceCustomString2Label=__stringConstant("IOC value")
event.deviceCustomString3=bundle
event.deviceCustomString3Label=__stringConstant("bundle")
event.deviceCustomString4=updateTime
event.deviceCustomString4Label=__stringConstant("IOC update time")
event.deviceCustomString5=enrichment
event.deviceCustomString5Label=__stringConstant("IOC enrichment")
Pull IOCs and event stream
trigger.node.location=/events
token.count=10
token[0].name=kind
token[0].type=String
token[0].location=/kind
token[1].name=requestDate
token[1].type=String
token[1].location=/request_date
token[2].name=iocType
token[2].type=String
token[2].location=type
token[3].name=iocValue
token[3].type=String
token[3].location=value
token[4].name=bundle
token[4].type=String
token[4].location=bundle
token[5].name=eventDate
token[5].type=String
token[5].location=event_date
token[6].name=eventType
token[6].type=String
token[6].location=event_type
token[7].name=enrichment
token[7].type=String
token[7].location=enrichment
token[8].name=nextStartDate
token[8].type=String
token[8].location=/next_start_date
token[9].name=nextUrl
token[9].type=String
token[9].location=/next
event.deviceReceiptTime=__createOptionalTimeStampFromString(nextStartDate,"YYYY-MM-DDThh:mm:ss.SSSX")
event.deviceCustomString6=nextUrl
event.deviceVendor=__stringConstant("Intsights")
event.deviceProduct=__stringConstant("Intsights Virtual Appliance")
event.deviceCustomString1=iocType
event.deviceCustomString1Label=__stringConstant("IOC Type")
event.deviceCustomString2=iocValue
event.deviceCustomString2Label=__stringConstant("IOC Value")
event.deviceCustomString3=bundle
event.deviceCustomString3Label=__stringConstant("Bundle")
event.deviceCustomDate1=__createOptionalTimeStampFromString(eventDate,"YYYY-MM-DDThh:mm:ss.SSSX")
event.deviceCustomDate1Label=__stringConstant("Event Date")
event.deviceCustomString4=eventType
event.deviceCustomString4Label=__stringConstant("Event Type")
event.deviceCustomString5=enrichment
event.deviceCustomString5Label=__stringConstant("IOC enrichment")
log.global.debug=true
log.channel.file.property.package.com.arcsight=0- Save and close the file.
To begin pulling IOCs
- Start the new connector.
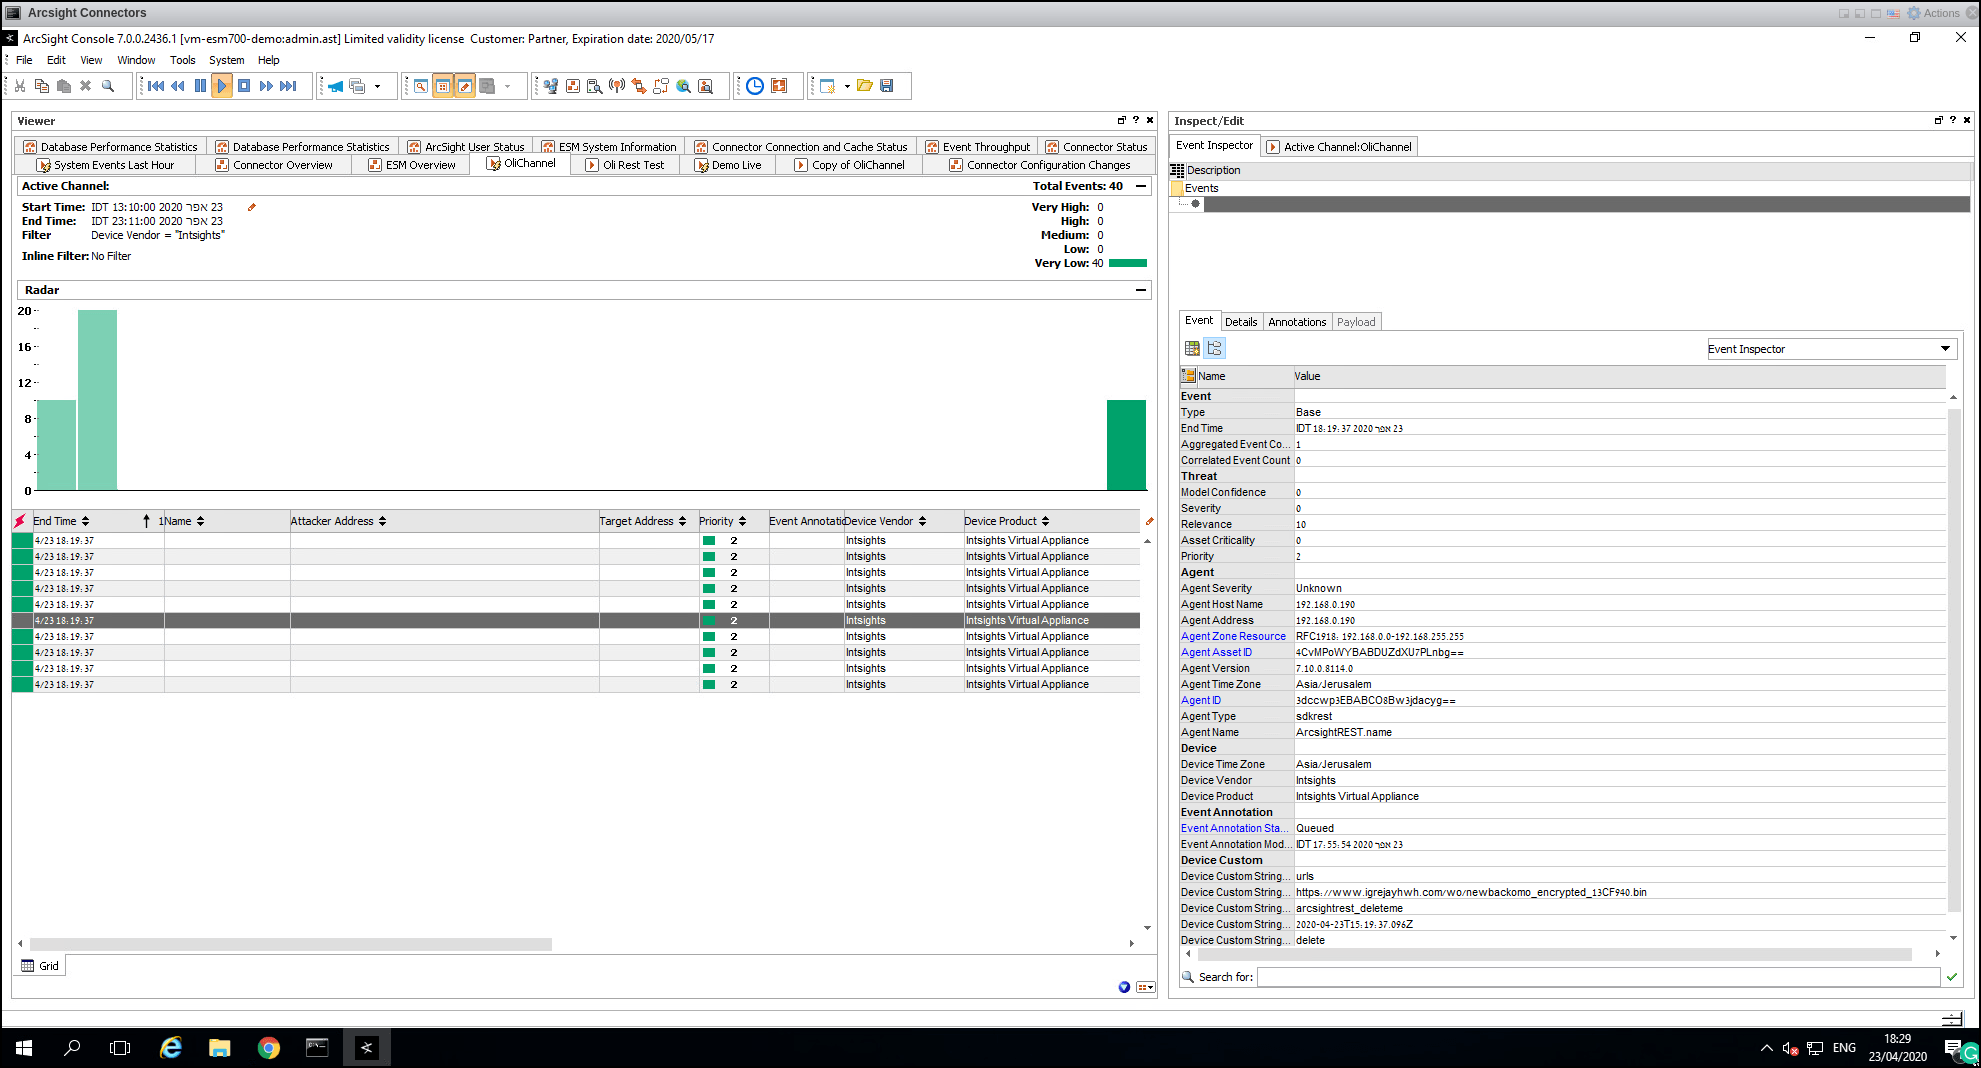
- Log in to the ArcSight console.
Once IOCs are collected in the Digital Risk Protection (Threat Command) IOC group, they are displayed in the ArcSights console:
- If you also pulled the events stream, you can view them by creating a channel in the ArcSight console: