ServiceNow Security App Installation and Configuration
This section describes how to install and configure the external app, Rapid7 Digital Risk Protection (Threat Command) for Security Incident Response and Threat Intelligence App (ServiceNow Security App), in the ServiceNow platform.
The following table shows the version compatibility between the ServiceNow Security App and ServiceNow releases.
| ServiceNow Security App | Changes | ServiceNow Releases |
|---|---|---|
| v2.1.0 | Add support for Utah and Vancouver releases Updated Alert Attachment Support Deprecated unused roles Added support for fetching updated alerts automatically Minor bug fixes | Rome, San Diego, Tokyo, Utah, and Vancouver |
Before you can use the external app with Rapid7 Digital Risk Protection (Threat Command) you need to add it.
Add external app
Before using an external app, you must add it. There are two parts to adding an app:
- Your admin must enable the app for you to add.
- After that, you add the external app.
To add an external app:
- From the main menu, select Automation > Integrations.
- From the Integrations page, click External.
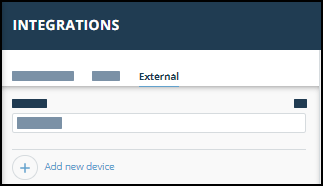
- Click Add new device.
- Select the Device type.
A default name is added. If the external device to add isn’t displayed, ask your admin to enable it for you. - Click Add.
The new device is added.
Installing the ServiceNow Security App
The ServiceNow system administrator can install the ServiceNow Security App from the ServiceNow store.
Prerequisites:
- You must be the ServiceNow system administrator.
- You must have access to the ServiceNow Store.
- You must have the Security Incident Response Module installed in the ServiceNow platform.
- You must add the external app in the Rapid7 Digital Risk Protection (Threat Command).
Add external app
Before using an external app, you must add it. There are two parts to adding an app:
- Your admin must enable the app for you to add.
- After that, you add the external app.
To add an external app:
- From the main menu, select Automation > Integrations.
- From the Integrations page, click External.
- Click Add new device.
- Select the Device type.
A default name is added. If the external device to add isn’t displayed, ask your admin to enable it for you. - Click Add.
The new device is added.
To install the ServiceNow App:
- Log in to the ServiceNow Store at https://store.servicenow.com/
- Search for Rapid7 ServiceNow Security App.
You can reach the app directly here . - Click the application to view the details.
- In the top-right corner of the form, click Manage Entitlements.
- Select your ServiceNow instances to install the application, then click OK.
The application is available on the ServiceNow selected instances.
- Log in to ServiceNow instance as a system administrator.
- Choose System Applications > All Available Applications > All.
- Search for Rapid7 ServiceNow Security App.
- Click Install.
The ServiceNow App is installed.
Configuring the ServiceNow IR App
After installing the ServiceNow Security App, the ServiceNow system administrator must configure the system. This configuration registers the ServiceNow Security App with your Rapid7 ETP Suite instance.
The ServiceNow system administrator is required to provide the Digital Risk Protection (Threat Command) account ID and API key in the ServiceNow Security App. This enables the ServiceNow Security App to connect with your Rapid7 instance. For more information, see API key, account ID, and appliance key.
After the connection is established, the ServiceNow Security App will import all the available Digital Risk Protection (Threat Command) alerts to ServiceNow as incidents.
Prerequisites:
- You must be the ServiceNow system administrator.
- You must have the Rapid7 ETP Suite API key and account ID.
- The time zone between the ServiceNow platform and the Digital Risk Protection (Threat Command) must be the same. For more information, see Setting-up Time Zone.
To set up the ServiceNow Security App properties:
-
Log in to ServiceNow as a system administrator.
-
From the left navigation pane, choose Rapid7 ServiceNow Security App > Configurations.
-
In the Account ID field, enter the Digital Risk Protection (Threat Command) account ID.
-
In the API Key field, enter the Digital Risk Protection (Threat Command) API key.
-
Click Check Connection.
The system validates the account ID and API key. Upon the successful validation Security Incident options display. -
Configure the Security Incidents options:
- In the Select Type to fetch the Alerts field, select the Digital Risk Protection (Threat Command) alert types to import.
- In the Select Severity to fetch the Alerts field, select the Digital Risk Protection (Threat Command) alert severities to import.
- From the Report Date drop-down list, select the report days to import alerts.
Note: By default, all alert types and severities are selected, and reporting is for the last 30 days.
-
Click Update and Save.
The system again validates the Account ID and API key. Upon successful validation, a job runs that imports all the open alerts from your Digital Risk Protection (Threat Command).