Network zones and policies
Defining network zones and effective network policies is an excellent way to mitigate risk. This way, you can easily tell when employees are violating their access rights. You can also quickly identify a compromised user if an employee’s account triggers a policy violation and the employee is not responsible for the event.
Define a network zone
Network zones allow the logical labeling of different systems or business groups based on IP ranges.
To define a network zone:
- In SIEM (InsightIDR), select the Settings page from the lefthand menu. In the proceeding list, select Network Zones near the bottom.
-
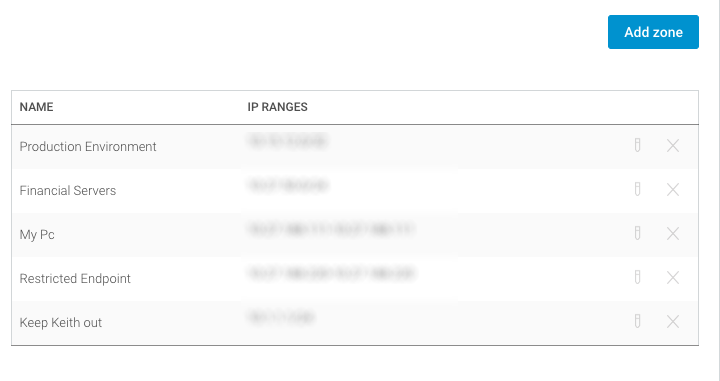
Click the Add Zone button.
-
Enter the name for the range in the “Zone Name” field.
-
Enter the range in the “IP Range” field. The format is xxx.xxx.x.x/xx, where the values before the
/are the starting range and the value after is the last entry in the range.- For example, the range 1.1.1.1/24 defines the values 1.1.1.0, 1.1.1.1, 1.1.1.2, to the address 1.1.1.255.

- Click the check mark icon to save the zone.
Edit a network zone
To edit a network zone:
- Click on the pencil icon to the right of the range that you want to edit.
- Make the required edits.
- Click the check mark icon to save the changes.
Define a network policy
Network policies are used alongside network zones. After you’ve created a network zone, use network policies to monitor access to the zone. An SIEM (InsightIDR) investigation will be generated any time a policy is violated.
Groups are defined by network zones and Active Directory group membership.
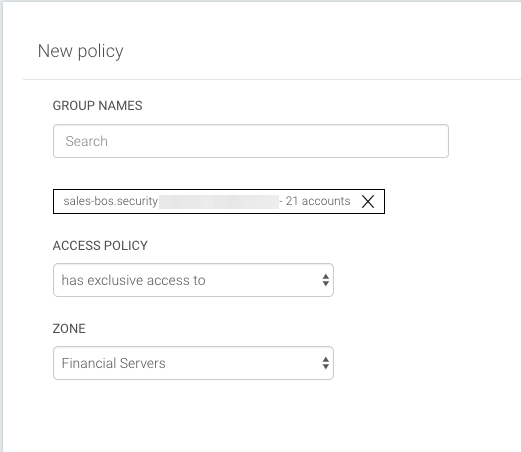
To define network policies:
- From your SIEM (InsightIDR) homepage, select Settings from the lefthand menu.
- Select Network Policies from the list.
- You will see a table of existing policies, if present. Select the Add Policy Button.
- Search for and select one or more groups from your Active Directory.
- Choose an access policy.
- Choose a network zone.
- Select Save.