Non-Admin Domain Controller Account
You need a Domain Account to set up event sources like LDAP and Active Directory. SIEM (InsightIDR) uses log data from those event sources to properly attribute all of your organization’s events to the users involved and to add context to analytics. The easiest way to acquire these logs is to use a Domain Admin account to query the Domain Controllers.
The Domain Account you use might need administration permissions for specific configurations. For example, when setting up an Active Directory event source.
SIEM (InsightIDR) leverages Windows Management Instrumentation (WMI) to query the Active Directory Domain Controllers for the Security Event logs with an Admin account. It also leverages Distributed Component Object Model (DCOM) technology to handle the remote calls to the Domain Controllers.
However, some restrictions in your environment may require that you query the Domain Controllers using a non-admin account.
To grant a non-admin user the ability to connect to Domain Controllers and utilize remote read, launch, and access permissions:
You can also add additional domain controllers.
Grant DCOM Permissions
To grant DCOM permissions, you must complete several steps to connect the Domain Controllers and query the AD security logs with the appropriate permissions:
- Add a domain user to specific groups
- Grant remote launch and activation permissions
- Grant remote access permissions
Add a Domain User to Specific Groups
This non-admin user must be included in specific Windows groups in order to act as a non-admin service account for Rapid7 in place of a domain admin.
To add the standard domain user to these groups:
- Create a standard domain user following the directions here: https://support.microsoft.com/en-us/help/13951/windows-create-user-account
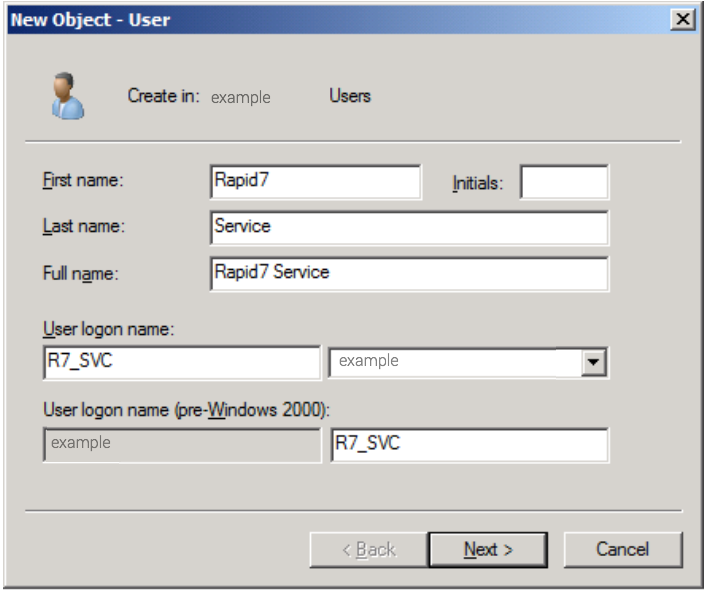
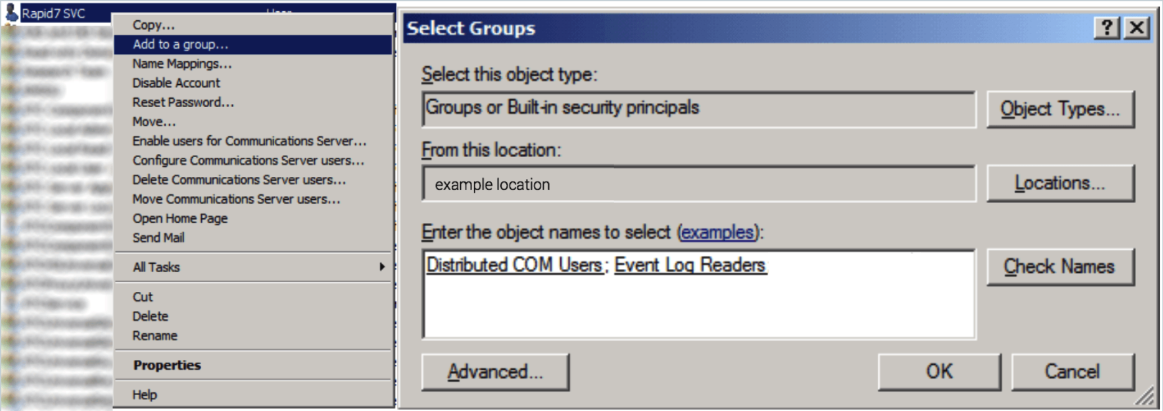
- After you create the user, add the user to the following built-in groups:
- Distributed COM Users
- Event Log Readers
Grant Remote Launch and Activation Permissions
Now, you must give the user proper remote launch permissions.
This step must be completed on every domain controller.
To grant remote launch permissions:
- From your Windows start menu, click Start > Run to launch the command terminal and enter the following command:
DCOMCNFG. - Click the OK button. The “Component Services” window appears.
- Expand the Component Services > Computers path, and right-click My Computer > Properties.
- In the “My Computer Properties” window, click the COM Security tab.
- Under “Launch and Activation Permissions,” click the Edit Limits button.
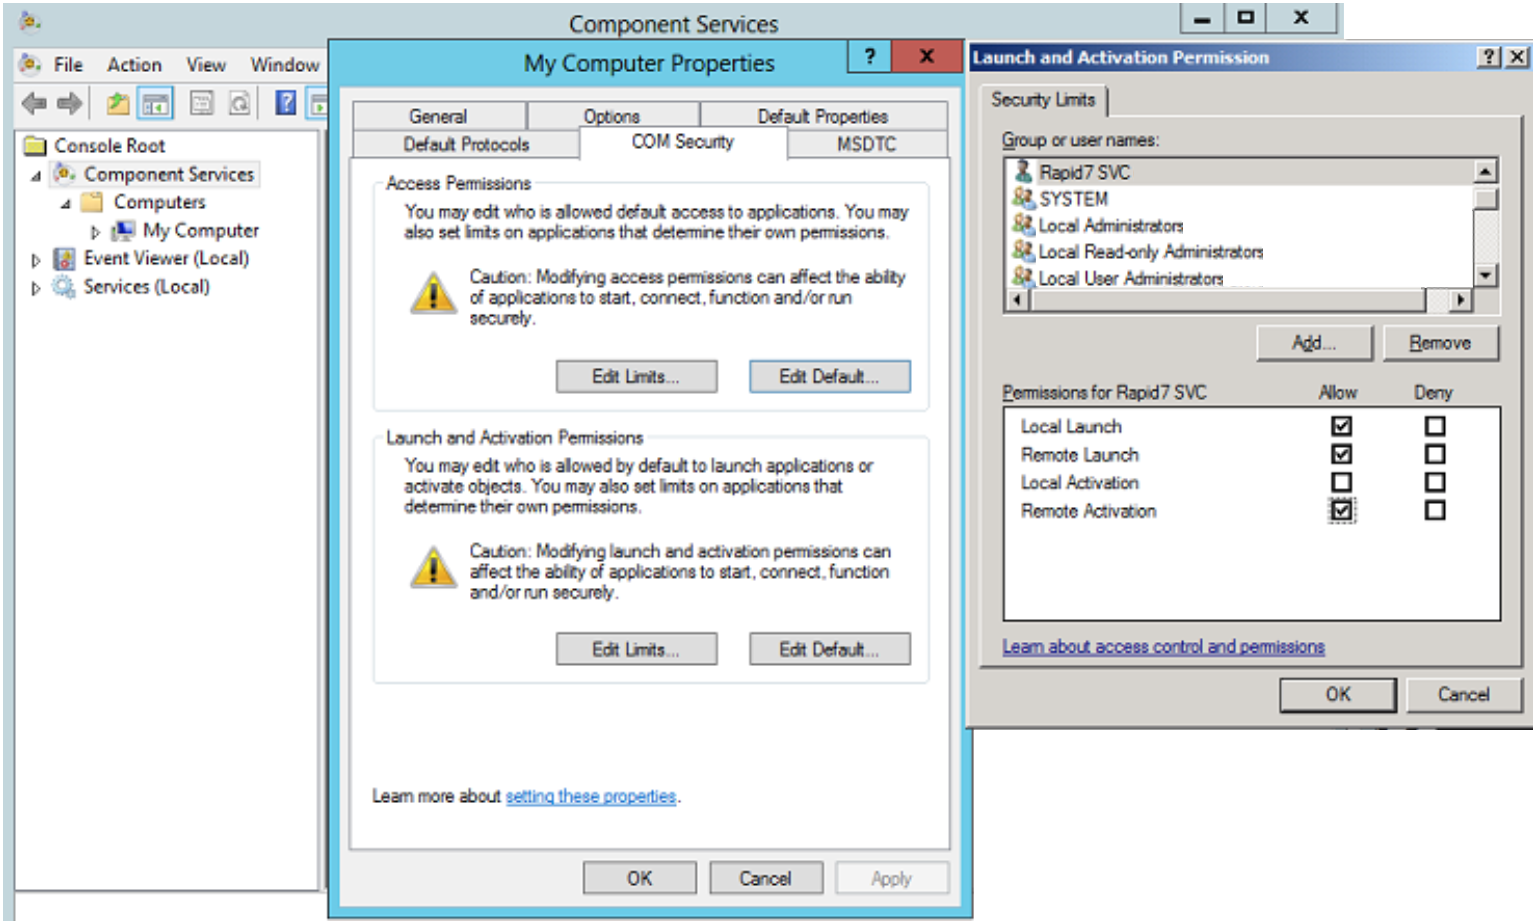
- In the “Launch Permission” box, make sure your name or group appears in the list. If it does not appear in the list:
- Click the Add button.
- In the “Select Users, Computers, or Groups” box, add your name and group in the “Enter the object names to select” box.
- Click the OK button.
- In the “Allow” column under “Permissions for User,” check the Remote Launch and Remote Activation boxes to enable these permissions.
- Click the OK button to grant remote launch and activation permissions to the user.
The user now has remote launch and activation permissions.
Grant Remote Access Permissions
Now the user account needs remote access permissions in order to act as a service account. To grant remote access permissions:
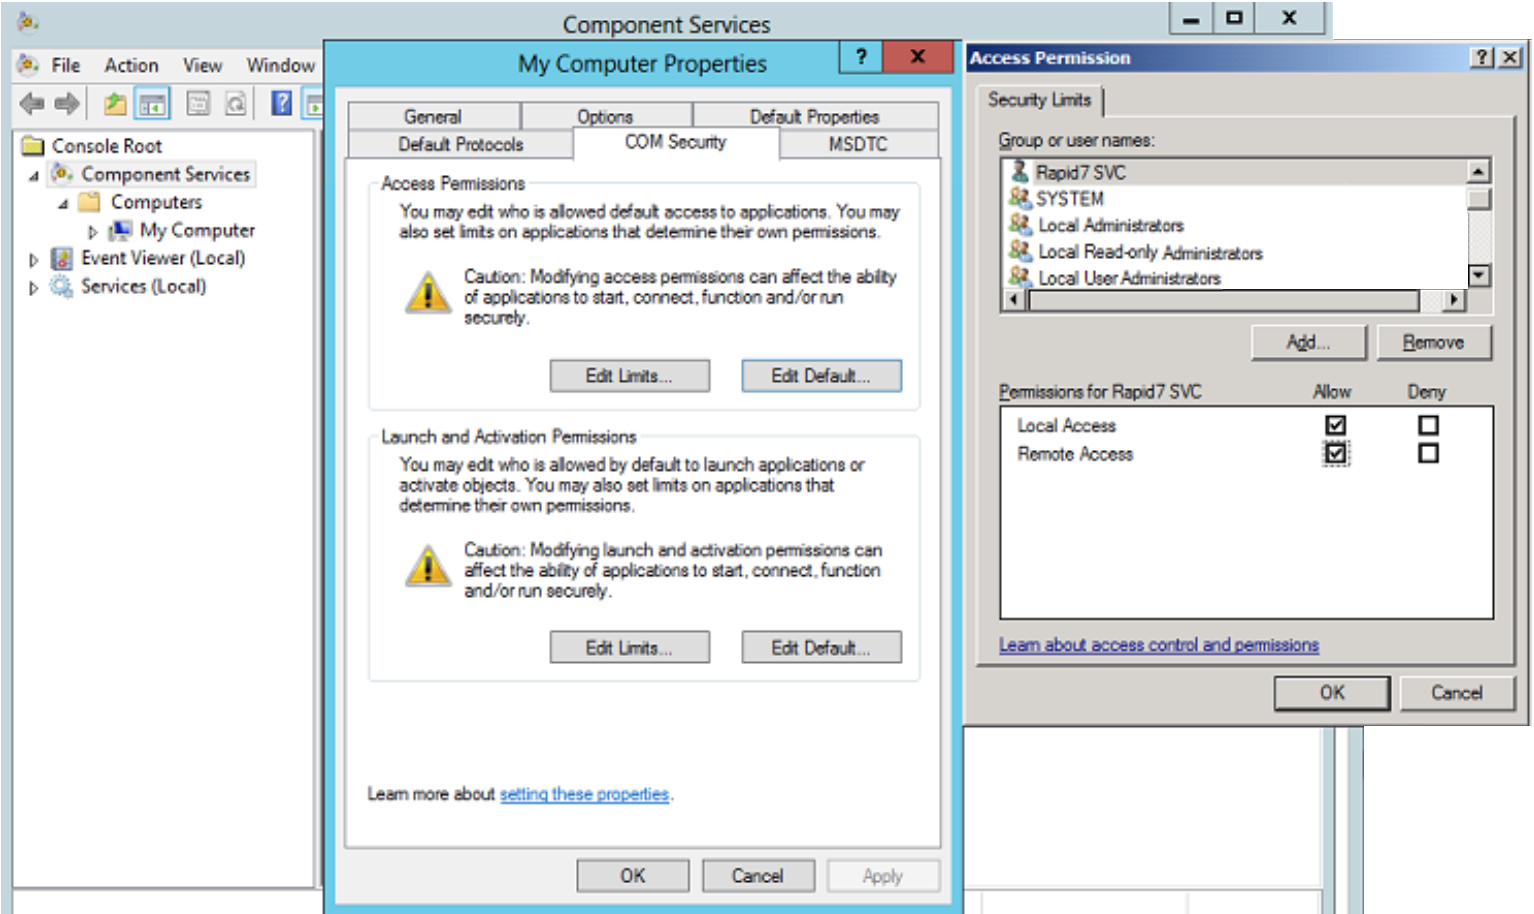
- Return to the “My Computer > Properties” window from the “Component Services” window you accessed in earlier steps.
- In the “My Computer Properties” dialog box, click the COM Security tab.
- Under “Access Permissions,” click the Edit Limits button.
- In the “Launch Permission” box, make sure your name or group appears in the list. If it does not appear in the list:
- Click the Add button.
- In the “Select Users, Computers, or Groups” box, add your name and group in the “Enter the object names to select” box.
- Click the OK button
- In the “Allow” column under “Permissions for User,” check the Remote Access box and click the OK button.
The user now has remote access permissions.
Grant WMI permissions
Now that the domain user has the permissions, you must give the user account permissions to work with Active Directory Query in the Windows Management Instrumentation (WMI) console.
To give permissions to work with AD Query to the user:
- From your Windows start menu, click Start > Run to launch the command terminal and enter the following command:
wmimgmt.msc. The “Computer Management” window appears. - Right-click the WMI Control option and select the Properties option from the dropdown.
- In the “WMI Control Properties” window, select the Security tab, and then expand the Root tree.
- Select the CIMV2 option and then click the Security button.
- Add the domain user that you’ve created to work with AD Query.
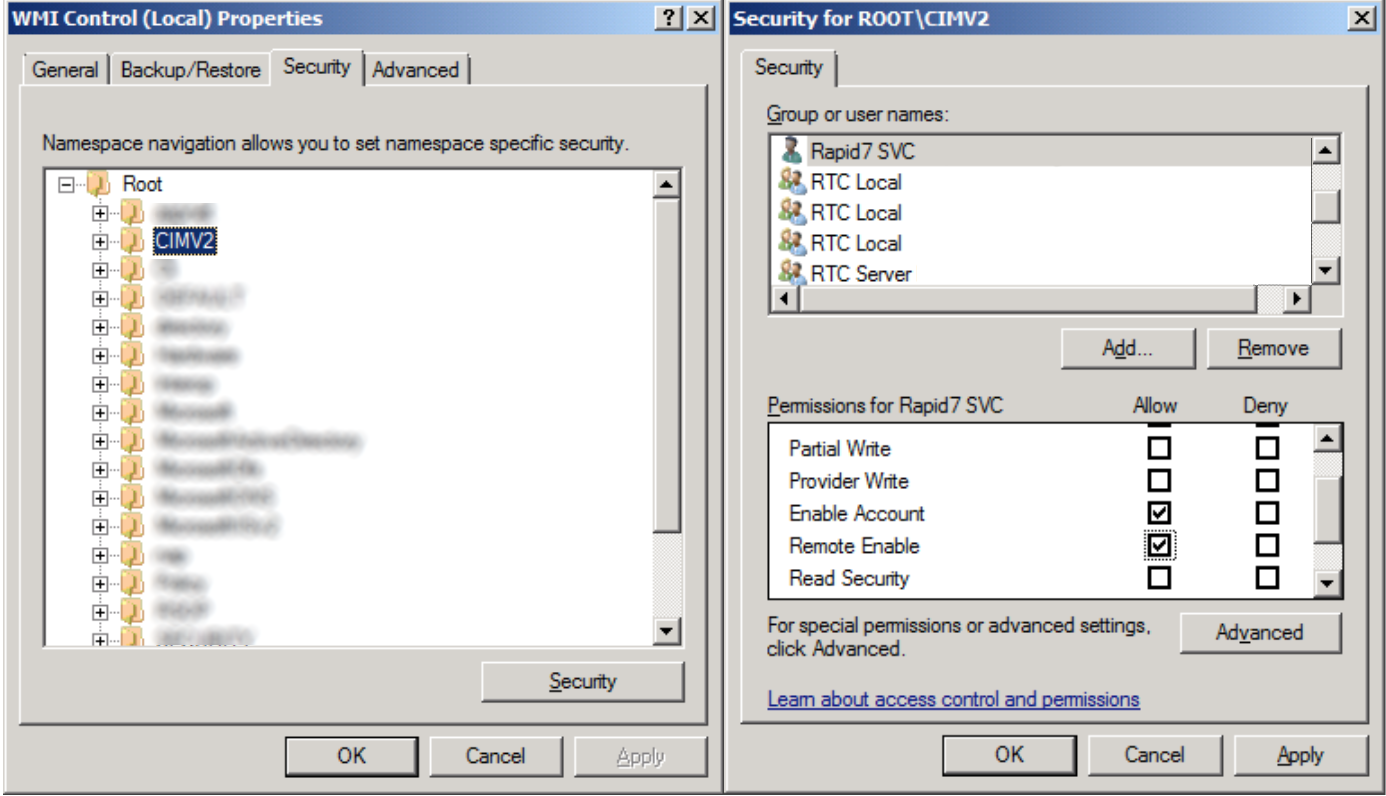
- Select and allow Enable Account, Remote Enable and Execute Method permissions.
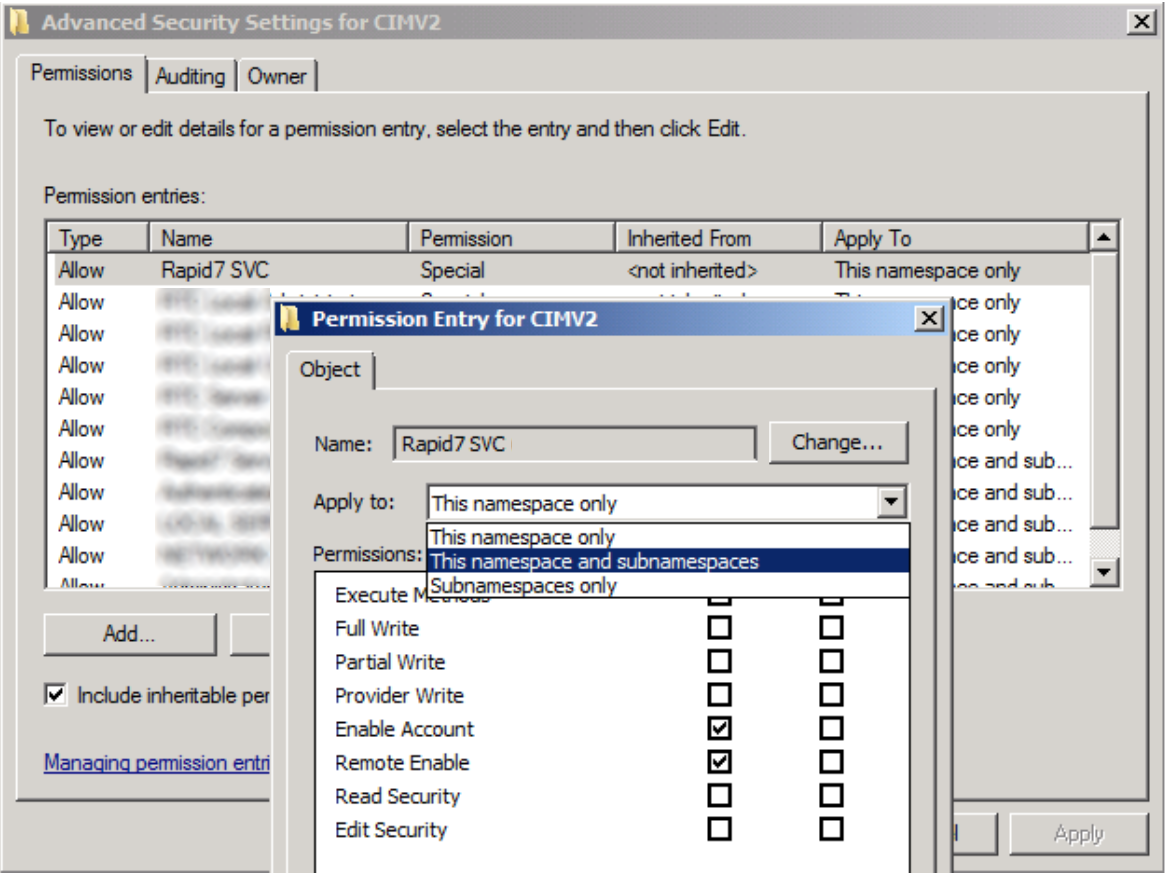
- Click Advanced.
- Select the domain user.
- Click “Apply to:” and set to “This namespace and subnamespaces.”
- Select OK to save changes.
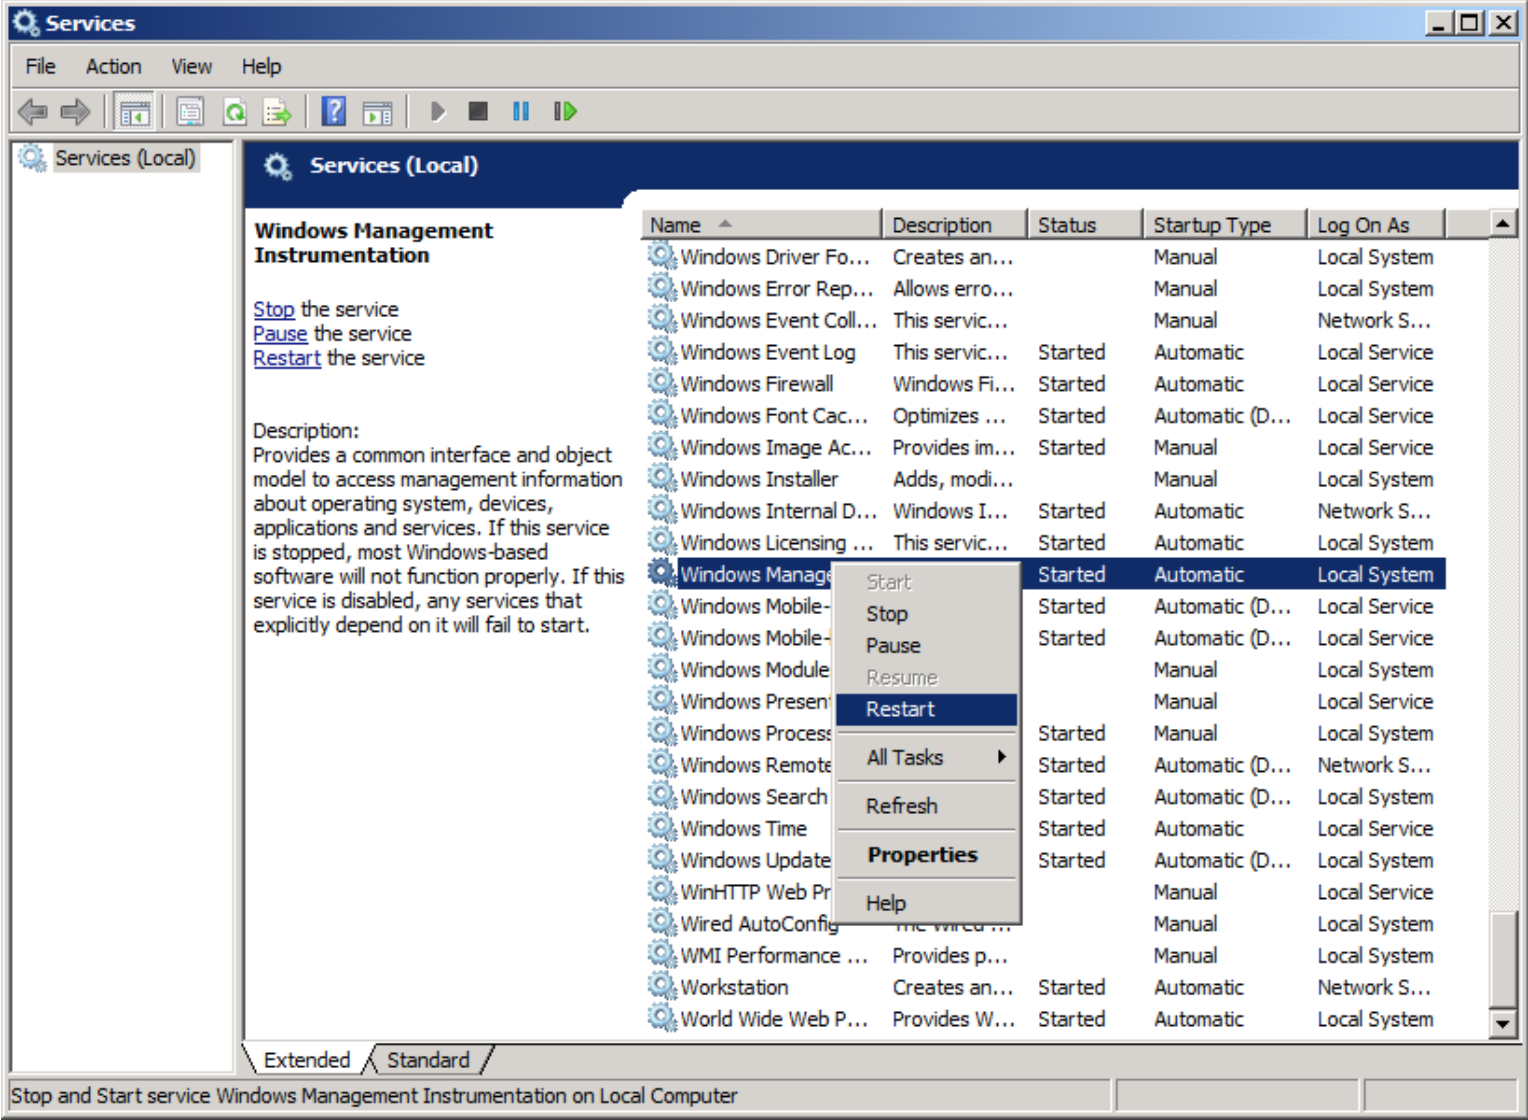
- To Restart the WMI service, click Start from your Windows menu and select “Services”.
- Right-click the “Windows Management Instrumentation” service, select Restart.
The non-admin domain user now has DC admin permissions.
Add Additional Domain Controllers
If you are adding additional Domain Controllers for AD Security Logs, you must enable WMI Permission on each target system. To do so, repeat the steps to [Grant DCOM Permissions],[Grant WMI Permissions], and then restart the WMI service.